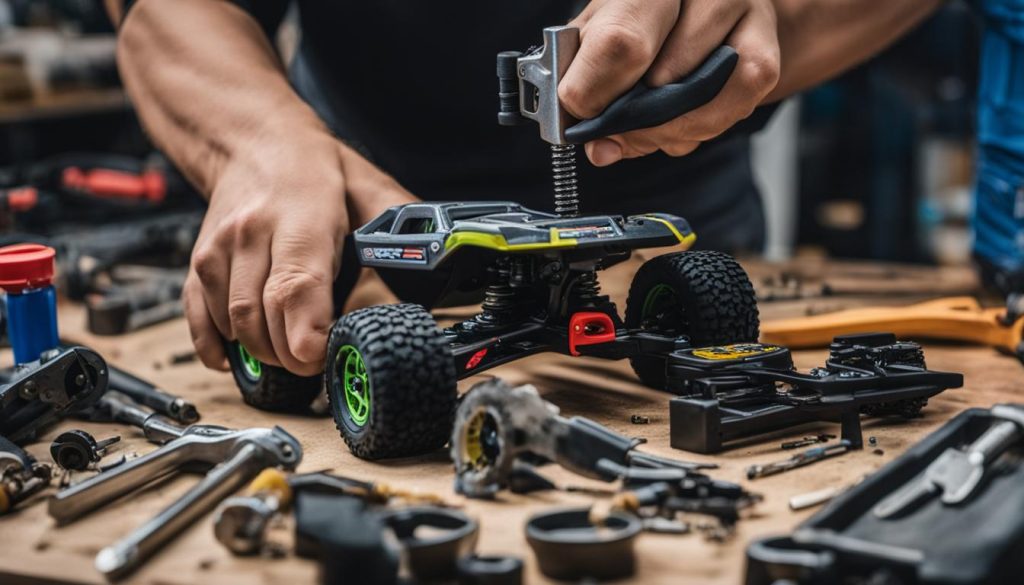
When your RC car refuses to work, it can be frustrating, but there are usually simple solutions to the problem. Before jumping to complex repairs, let’s go over some common trouble areas that are easy to fix. Always start by checking the basics before moving on to more complicated issues.
Key Takeaways:
- Follow these troubleshooting steps to fix an RC car that won’t work.
- Check the on/off switch and batteries for proper functioning.
- Verify the frequency and antennas to ensure proper communication.
- Test the servos and check the wiring for any issues.
- Inspect the gears and wheels for damage.
Now that you know the importance of addressing the common issues affecting RC cars, let’s dive into each troubleshooting step in more detail to get your RC car back on track and ready for action.
Check the On/Off Switch and Batteries
When troubleshooting a non-responsive RC car, the first step is to check the on/off switch on both the RC car itself and the transmitter. It may seem like a simple thing to overlook, but sometimes the switch can accidentally get turned off. Make sure both switches are in the “on” position before proceeding.
Next, inspect the batteries in the RC car. Ensure that they are correctly installed and not missing. It’s essential to have a reliable power source to operate the car effectively. If you notice any signs of battery corrosion, such as a buildup of white or greenish residue around the battery terminals, clean the contacts with a mixture of baking soda and water and a small brush. This will help improve electrical conductivity and prevent further battery-related problems.
If you are using a nitro RC car, don’t forget to check the fuel tank. Ensure there is enough nitro fuel and that there are no obstructions blocking the fuel from reaching the engine. A clear and unobstructed nitro fuel tank is crucial for the smooth operation of a nitro RC car.
Common Battery-Related Problems
| Problem | Cause | Solution |
|---|---|---|
| Battery not installed correctly | Incorrect battery placement | Reinstall the batteries correctly |
| Missing batteries | No batteries or incomplete set | Insert the required number of batteries |
| Battery corrosion | Buildup of corrosive residue on battery terminals | Clean the battery contacts with a mixture of baking soda and water |
| Fuel tank obstructions | Blockage preventing fuel flow | Clear any obstructions in the nitro fuel tank |
Remember to handle batteries with care and dispose of them responsibly. If the battery problems persist even after troubleshooting, it may be necessary to replace the batteries or seek further assistance.
Verify the Frequency and Antennas
If you own multiple RC cars or bought a used one, it’s crucial to ensure that you are using the correct transmitter with the right frequency for your RC car. Check the frequency labels on both the transmitter and the RC car and make sure they match.
Also, extend the telescoping antenna on your transmitter and ensure that the receiver antenna on the RC car is properly installed, undamaged, and not touching any metal parts.
Why is verifying frequencies and antennas important?
Using the correct frequency is vital for proper communication between your transmitter and RC car. Using mismatched frequencies can result in signal interference or loss, causing your RC car to malfunction. Additionally, ensuring that both the transmitter and RC car antennas are properly extended and installed helps optimize signal reception and range.
How to check the frequency
- Locate the frequency label on your RC car and make a note of it.
- Check the transmitter’s frequency label and compare it with the RC car’s frequency.
- If the frequencies match, proceed to inspect the antennas.
- If the frequencies don’t match, you may need to purchase a compatible transmitter or receiver.
Checking the antennas
- To ensure optimal signal reception, extend the telescoping antenna on your transmitter fully.
- Inspect the receiver antenna on the RC car to ensure it is properly installed, straight, and not damaged.
- Ensure that the receiver antenna is not touching any metal parts or obstructed by the car’s body or other objects.
| Frequency Label | Transmitter Frequency | RC Car Frequency | Antenna Extension | Receiver Antenna |
|---|---|---|---|---|
| 27MHz | 27MHz | 27MHz | Extend fully | Properly installed, undamaged, not touching metal |
| 49MHz | 49MHz | 49MHz | Extend fully | Properly installed, undamaged, not touching metal |
| 2.4GHz | 2.4GHz | 2.4GHz | Extend fully | Properly installed, undamaged, not touching metal |
Verifying the frequency and antennas of your RC car is an essential step in troubleshooting communication issues. By ensuring the correct frequency and proper antenna installation, you can improve the responsiveness and range of your RC car.
Test the Servos and Check the Wiring
If your RC car responds only partially to commands from the transmitter, the issue might be with the servos. To diagnose this problem, you can perform the following steps:
- Step 1: Unplug the servos from the receiver.
- Step 2: Plug the servos into a known-working receiver.
- Step 3: Test if the servos respond to commands from the new receiver.
If the servos fail to respond even when connected to a different receiver, it indicates a possible issue with the servos themselves. You may need to repair or replace them.
In addition to testing the servos, it’s essential to check for loose or broken wires that could affect the performance of the motor and steering servo. Examine the wire connections carefully and ensure they are securely attached and undamaged.
By troubleshooting the servos and checking the wiring, you can identify and resolve issues that may be causing your RC car to malfunction.
Common RC Car Servo Problems and Solutions
| Problem | Solution |
|---|---|
| Servos not responding | Check connections and test with a different receiver. Replace or repair servos if necessary. |
| Loose or broken wires | Inspect wire connections and repair or replace any damaged wires. |
| Poor servo performance | Clean and lubricate servos, adjust servo settings, or replace with higher-quality servos if needed. |
Inspect Gears and Wheels
When troubleshooting an unresponsive RC car, it’s essential to inspect the gears and wheels as they play a crucial role in the car’s performance. Several issues can arise in this area that may affect your RC car’s mobility and stability.
Slipped Gears
One common problem that can prevent an RC car from moving is slipped gears. The pinion gear, which connects to the motor, and the spur gear, which meshes with the pinion gear, may become misaligned or loose over time. This misalignment can cause the gears to slip and lead to a loss of power and control.
To fix slipped gears, follow these steps:
- Inspect the pinion gear and tighten it if necessary, ensuring a proper connection with the motor shaft.
- Check the alignment between the pinion gear and the spur gear. Adjust the gears to ensure they mesh correctly.
By tightening and aligning the gears, you can restore the power and performance of your RC car.
Broken Steering Arm
If your RC car wobbles or has difficulty turning, it may indicate a broken steering arm. The steering arm connects the steering mechanism to the front wheels and plays a vital role in controlling your RC car’s direction.
To diagnose a broken steering arm, follow these steps:
- Inspect the front wheels for any abnormal movement or misalignment.
- Check the steering arm for visible cracks or damage.
- If the steering arm is broken, replace it with a new one from your RC car’s manufacturer or an authorized dealer.
By replacing the broken steering arm, you can regain control over your RC car’s steering and improve its maneuverability.
Tire Condition and Suspension
The condition of your RC car’s tires and suspension system also plays a significant role in its performance. Worn-out tires with deteriorated tread can negatively impact traction and stability, making it challenging to control your RC car.
Inspect the following areas:
- Examine the tire tread and look for signs of excessive wear or bald spots.
- If the tire tread is compromised, replace the tires with new ones that provide optimal grip and traction.
- Inspect the suspension system and shock absorbers for any damage or misalignment. Ensure that all components are securely mounted and functioning properly.
By maintaining well-conditioned tires and a properly functioning suspension system, you can enhance the overall performance and handling of your RC car.
Now that you’ve inspected the gears and wheels, let’s proceed to the next section to troubleshoot overheating and charging problems that may be affecting your RC car’s functionality.

Troubleshoot Overheating and Charging Problems
If you notice that your RC car is overheating, it’s important to address the issue promptly to prevent damage to the motor and battery. Overheating can lead to reduced performance and even permanent failures. Follow these troubleshooting steps to diagnose and resolve overheating and charging problems with your RC car.
Check the Cooling System
Start by inspecting the cooling system of your RC car. Many high-performance RC cars are equipped with a cooling fan or heat sink to dissipate heat generated by the motor. Ensure that the cooling fan is running smoothly and that there are no obstructions blocking the airflow. Clean the fan blades and remove any debris that may be hindering proper cooling. If the cooling fan is damaged or not functioning correctly, consider replacing it.
Inspect the Motor
The motor is a common source of overheating in RC cars. Check for any visible signs of damage, such as melted wires or a burning smell. If you notice any abnormalities, it may indicate a faulty motor that needs to be replaced. Additionally, ensure that the motor is properly lubricated to reduce friction and heat buildup during operation. Refer to the manufacturer’s guidelines for the appropriate lubricant to use.
Examine the Battery
In some cases, the battery itself may be the cause of overheating. Inspect the battery for any signs of swelling, leakage, or damage. If the battery is damaged or swollen, it should be replaced immediately to prevent further issues. Ensure that the battery is securely connected to the RC car and that the battery terminals are clean and free from corrosion. Dirty or corroded terminals can impede proper charging and lead to overheating.
In addition to addressing overheating, charging problems can also affect the performance of your RC car. Check the charging cable for any visible damage or frayed wires. A faulty or damaged charging cable can prevent proper charging and lead to battery issues. Ensure that the charging cable is securely connected to both the charger and the battery. It’s essential to establish a solid connection to ensure efficient charging.
If your RC car’s battery does not hold a charge, it may be a sign of a defective or worn-out battery. Consider replacing the battery with a new one of the appropriate specification to maintain optimal performance and avoid charging problems.
| Common Causes of Overheating and Charging Problems | Troubleshooting Steps |
|---|---|
| Faulty cooling system | Clean or replace the cooling fan; ensure proper airflow |
| Damaged or worn-out motor | Inspect for damage and replace if necessary; |
| Swell, leaks, or damage battery | Replace damaged or swollen battery; clean battery terminals |
| Faulty charging cable | Inspect for damage or frayed wires; ensure secure connection |
| Defective or worn-out battery | Replace with a new battery of the appropriate specification |
If you’ve followed these troubleshooting steps and are still experiencing overheating or charging problems with your RC car, it may be necessary to seek professional assistance. An RC car specialist can provide further diagnostics and recommend appropriate repairs. Remember to prioritize safety when dealing with any electrical components, and always follow the manufacturer’s guidelines and recommendations for your specific RC car model.
Resolve Signal and Reception Issues
If your RC car is not receiving a signal, it can be quite frustrating. However, there are a few steps you can take to troubleshoot the issue and get your RC car back on track.
Check the Batteries and Antenna
The first thing to do is to check the batteries in your remote control. Make sure they are properly inserted and have enough charge. Weak batteries can result in a weak or no signal reaching your RC car.
Next, inspect the antenna on your remote control and make sure it is undamaged and connected correctly. A damaged antenna can interfere with the signal transmission, causing your RC car to not receive any commands.
If you find that the antenna is damaged, it may need to be replaced. Look for a compatible antenna for your specific model of RC car to ensure proper signal reception.
Consider Interference and Frequency Channels
Interference from other devices operating on similar frequencies can disrupt the signal between your remote control and RC car. To avoid interference, try changing the frequency channel on both your remote control and your RC car.
Refer to the manufacturer’s instructions to learn how to change the frequency channel. This will help you avoid conflicting with other devices and ensure a clear, uninterrupted signal.
| Problem | Possible Solution |
|---|---|
| No signal received | Check batteries in the remote control and ensure the antenna is undamaged and connected correctly. Change the frequency channel to avoid interference. |
| Weak signal or intermittent reception | Replace weak batteries in the remote control. Check the antenna for damage and proper connection. |
Test the Range
If you have followed the previous steps and are still experiencing signal issues, it may be helpful to test the range of your remote control. Find an open area with minimal obstacles and see how far you can still control your RC car. This will help you determine if the issue is related to the signal strength or any other factors.
By checking the batteries, antenna, and considering interference and frequency channels, you can resolve signal and reception issues with your RC car. These troubleshooting steps will ensure a smooth and enjoyable RC car experience without any interruptions.

Return or Attempt Extensive Repairs
If the previous troubleshooting steps have not resolved the issue with your RC car, there are two main options to consider: returning the car or attempting more extensive repairs. The best course of action depends on factors such as warranty coverage, the value of the car, and your expertise in troubleshooting and repairing RC cars.
If your RC car is still under warranty, returning it to the manufacturer or retailer is a viable option. Check the warranty terms and conditions to determine if the issue you’re experiencing qualifies for a return or repair. Returning the RC car ensures that the professionals with expertise in troubleshooting and repairing RC cars will handle the problem.
However, if your RC car is out of warranty or you prefer to attempt the repairs yourself, you can opt for extensive repairs. Keep in mind that this approach may require additional time, effort, and expense on your part. It is essential to assess the value and cost of repairs, particularly for toy-grade RC cars, which may not be designed for extensive repairs.
When attempting extensive repairs, it is recommended to have a good understanding of troubleshooting and repairing RC cars. Consulting manufacturer guides, online forums, or reaching out to experienced RC hobbyists for advice can be helpful. Be prepared to invest in the necessary tools, replacement parts, and take the time to thoroughly diagnose and repair the RC car.
Pros and Cons of Returning RC Car or Attempting Extensive Repairs
| Returning RC Car | Attempting Extensive Repairs |
|---|---|
| Convenient solution if the car is still under warranty | Opportunity to learn more about troubleshooting and repairing RC cars |
| Professionals with expertise will handle the repairs | May save money on repair costs |
| Eliminates the need for extensive troubleshooting | Can provide a sense of accomplishment and satisfaction |
| Potential wait time for the return process | |
| May require investing in specialized tools and replacement parts | |
| Limited control over repair quality | |
Consider weighing the benefits and drawbacks of returning the RC car or attempting extensive repairs to make an informed decision. Ultimately, the goal is to restore your RC car to full functionality and enjoy your hobby-grade or toy-grade RC car to the fullest.
Conclusion
Successfully troubleshooting an unresponsive RC car like the Bezgar RC car HP161S involves following simple steps and checking common problem areas. By practicing regular maintenance and being aware of potential issues, you can ensure that your RC car runs smoothly and stays in excellent condition.
Remember to always refer to the manufacturer’s instructions for guidance on specific troubleshooting and maintenance procedures. It’s also essential to prioritize safety precautions such as wearing protective gear, working in a well-ventilated area, and keeping small parts and batteries out of reach of children.
By staying proactive in fixing RC car issues, maintaining your RC car, and addressing common problems promptly, you can enjoy endless hours of thrilling RC car adventures and preserve the longevity of your beloved Bezgar RC car HP161S and other RC cars in your collection.
FAQ
How do you fix an RC car that won’t work?
When troubleshooting an unresponsive RC car, start by checking the basics. Make sure the on/off switch on both the RC car and the transmitter is turned on. Verify that the batteries in the RC car are installed correctly and not missing. For nitro RC cars, check the fuel tank for fuel and any obstructions.
What should I do if my RC car is not responding?
If your RC car only responds partially to commands from the transmitter, the issue might be with the servos. Try unplugging the servos from the receiver and plugging them into a known-working receiver to see if they respond. Check for loose or broken wires that could affect the motor or steering servo.
How can I verify the frequency and antennas for my RC car?
It’s crucial to ensure that you are using the correct transmitter with the appropriate frequency for your RC car. Check the frequency labels on both the transmitter and the RC car to make sure they match. Extend the telescoping antenna on your transmitter and ensure that the receiver antenna on the RC car is properly installed, undamaged, and not touching any metal parts.
What should I check if my RC car doesn’t move or wobbles?
Slipped gears can prevent an RC car from moving, so check if the pinion gear needs tightening and realignment with the spur gear. If your RC car wobbles, it may indicate a broken steering arm that needs replacement. Pay attention to the condition of the tires, including the tire tread, as worn-out tires can affect performance. Additionally, inspect the suspension system and shock absorbers for any issues.
How do I troubleshoot overheating and charging problems with my RC car?
If your RC car is overheating, it could indicate a faulty motor or a battery that is heating up. Check if the cooling system is functioning correctly and adjust or replace it as needed. When your RC car is not charging, investigate the charging cable for proper connection and ensure the battery is making a solid connection. If the battery does not hold a charge, it may need replacement.
What can I do if my RC car is not receiving a signal?
If your RC car is not receiving a signal, check the batteries in the remote control and verify that the antenna is undamaged and connected correctly. Consider changing the frequency channel on both the remote control and the RC car to avoid interference from other devices.
Should I return my RC car if the issue persists?
If the previous troubleshooting steps did not solve the issue and your RC car is still under warranty, you may consider returning it. Alternatively, you can attempt more extensive repairs, but keep in mind that this might involve additional time and cost. Consider the value and cost of repairs, especially for toy-grade RC cars.